Santa Fe Soup
December 20, 2010
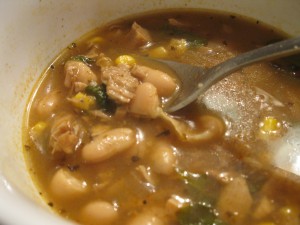
This soup is super easy and SO delicious! If you like beans you’ll love this soup! It’s one of my favorites. Enjoy.
Santa Fe Soup
1 14 oz can black beans, rinsed
1 14 oz can navy beans, rinsed
1 14 oz can mild chili beans with liquid (kidney beans could be substituted here-be sure to rinse)
1 14 oz can whole kernel corn, drained
1 28 oz can tomato sauce
1 small can diced tomatoes with chilies (like Rotel)
1 medium onion, diced
1-1 1/2 lbs ground beef
1 packet original taco seasoning
1 packet Ranch seasoning mix
Begin by sauteing diced onions in a little oil until just translucent. Add ground beef and cook until brown. Drain off excess fat. Into a crock pot or stock pot add all ingredients and stir together. Add 1 cup of water or beef broth to thin soup if needed. Cook on low in the crock pot 6-8 hours or simmer 1 1/2-2 hours on the stove.
Serve with shredded cheese, tortilla chips and sour cream.
*For a ligher version, try using shredded chicken or ground turkey.
Blueberry Scones
April 26, 2010
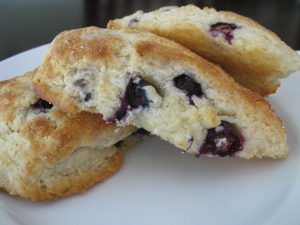
I think I am going to call these, “oh my gosh they’re so good” blueberry scones because that’s what I said when I tasted one after I baked them today. Seriously the best scone I’ve ever had. I really don’t have much else to say about them except that my mouth is still watering thinking about them and I need to stop typing this and go eat another one! Or maybe I’ll go wrap them up before I lose all control and take them to work tomorrow. These are almost too good to share. So flaky, so buttery…Go make them! I don’t know why I waited so long!
Blueberry Scones
adapted from America’s Test Kitchen
makes 8 scones
- 8 Tablespoons cold butter, plus more for brushing
- 2 cups all-purpose flour
- 1/2 cup granulated sugar, plus more for sprinkling
- 2 teaspoons baking powder
- 1/4 teaspoon baking soda
- 1 teaspoon kosher salt
- 1 teaspoon lemon zest
- 1/2 cup sour cream
- 1/2 cup whole milk
- 1 1/2 cups fresh blueberries, frozen
Grate the butter on the large holes of a box grater, and freeze.
Preheat oven to 425, and combine the dry ingredients. Stir in frozen butter. Whisk together the sour cream and whole milk, and stir into the dry ingredients with a wooden spoon until just combined. The dough will be crumbly, but that’s okay.
Turn out onto a well-floured surface, and knead a few times. Roll out into a 12×12 inch square. Using a bench scraper, fold the dough into thirds, then fold into thirds again in the opposite direction to form a square. Roll the dough out into a 12×12 inch square again, and refold. Place on a well-floured plate, and freeze for 5 minutes.
Roll out to a 12×12 inch square for a final time, and press the blueberries into the dough in a single layer. Carefully roll up, as you would cinnamon rolls. Press the roll into a 4-inch wide rectangle. Using the bench scraper, cut into 4 rectangles. Then cut each rectangle diagonally to make 2 triangles.
Place on a baking sheet lined with parchment paper. At this point the scones can be baked or refrigerated overnight. Brush with melted butter, then sprinkle with sugar. Bake 18-25 minutes, or until golden-brown.
My Favorite Dessert
April 26, 2010
I loooove cheesecake. Turtle cheesecake, chocolate cheesecake, oreo cheesecake…but my favorite is really just plain old cheesecake. As a teenager, my younger sister and I shared a room and would watch the Golden Girls at night when we went to bed. We used to watch it at our grandma’s and have always loved that show. Well, if you’ve ever watched the Golden Girls, you know they are always up late at night talking and eating cheesecake! When my sister and I both moved out of our parents’ house, we would still get together sometimes and have coffee and cheesecake.I don’t get to see her much anymore with our busy lives, but every time I eat cheesecake I think about her and our late nights watching the Golden Girls.
I saw this recipe in a magazine this month and decided to make it when some friends came over last week. It turned out so well. It might be my favorite cheesecake recipe so far. It was perfect with some strawberries on top. If you love cheesecake too, try this recipe out. It’s the perfect “plain old cheesecake” recipe when you don’t want anything but cheesecake.
Philadelphia Vanilla Mousse Cheesecake
40 Nilla Wafers, crushed (about 1 1/2 cups)
3 Tbsp. butter or margarine, melted
4 pkg. (8 oz. each) Philadelphia cream cheese, softened, divided
1 cup sugar, divided
1 Tbsp. plus 1 tsp vanilla, divided
3 eggs
1 tub (8 oz.) Cool Whip whipped topping, thawed
Heat oven to 325 degrees. Mix wafer crumbs and butter; press onto bottom of 9-inch springform pan. Beat 3 pkg. cream cheese, 3/4 cup sugar and 1 Tbsp. vanilla with mixer until well blended. Add eggs, 1 at a time, mixing on low speed after each just until blended. Pour over crust.
Bake 50 to 55 min. or until center is almost set. Run knife around rim of pan to loosen cake; cool completely in pan. Beat remaining cream cheese, sugar and vanilla with mixer in large bowl until well blended. Whisk in Cool Whip; spread over cheesecake. Refrigerate 4 hours. Remove rim of pan before serving cheesecake. Garnish with fresh berries if desired.
*I always use a water bath when baking cheesecake. It helps to prevent the cheesecake from cracking when baking. Simply wrap the bottom and sides of the cheescake pan in foil and to prevent any water from seeping in. Place the pan in a pan or dish with sides and cover the bottom of that dish with 1/4-1/2″ of water. It’s easier if you place both pans in place on the oven rack before pouring in the water.
Source: Real Simple Magazine 10th Anniversary Issue, p. 262
Steak with Feta
April 14, 2010
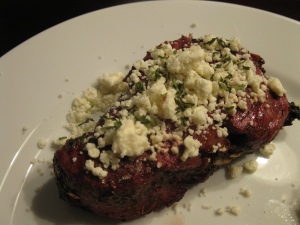
After a long hiatus, I have a blog entry. Yes, I am still cooking but not blogging about it so much lately. But I felt I needed to blog about this! My husband got a new grill a couple months ago and now that the weather is warming up, we’re finally able to use it. I had bookmarked this recipe a while back and decided to give it a try a couple days ago. It was really good and a bit different that just any old grilled steak. We both enjoyed it! The feta gives the steak a nice bite.
Steak with Feta
Greek Marinade (below)
2 pound beef boneless sirloin steak, about 1 inch thick (I used filets)
2 medium red onions, cut into 1/2-inch slices (I omitted)
1 package (4 ounces) crumbled feta cheese
Chopped fresh parsley, if desired
In shallow glass or plastic dish or resealable plastic food storage bag, make Greek Marinade. Pierce beef with fork several times on both sides. Add beef and onions to marinade; turn to coat. Cover dish or seal bag and refrigerate, turning beef occasionally, at least 8 hours but no longer than 24 hours.
Heat coals or gas grill for direct heat. Remove beef from marinade; reserve marinade.
Cover and grill beef and onions over medium heat 15 to 20 minutes for medium beef doneness, brushing occasionally with marinade and turning once. Discard remaining marinade.
Cut beef across grain into thin slices. Sprinkle beef with feta and parsley; serve with onion slices.
Greek Marinade
1/2 cup dry red wine or beef broth
1 tablespoon packed brown sugar
3 tablespoons olive oil or vegetable oil
1 1/2 teaspoons dried oregano leaves
1/2 teaspoon salt
1/4 teaspoon ground cinnamon
2 cloves garlic, finely chopped
In small bowl, mix all ingredients. About 3/4 cups.
Betty Crocker Grilling Made Easy, p. 54
Adventures with Baby Food: Yellow Squash
January 25, 2010
I’ve been using my days off to prep baby food for the week. Later this week we’re going to try squash so I went ahead and made it today. This was probably the most difficult baby food I’ve made so far, and it’s not even really difficult just more involved. I’ll post an update later this week on what the food critic aka the baby says!
Baby Food: Yellow Squash
5 small-medium yellow squash (washed thoroughly, ends cut off)
Preheat oven to 400 degrees. Slice the squash in half lenghwise and place skin side up on a baking sheet. Roast for 20-25 minutes or until a knife can easily pierce the squash. Allow to cool. Puree well in a food processor. The puree will have a grainy appearance. Next, place a mesh strainer over a bowl and spoon the pureed squash mixture into the strainer. With a rubber spatula press the squash through the strainer.
This is what will be left in the strainer
This is what’s in the bowl.
Freeze the squash in baby food freezer trays like I did here. 5 small-medium squash made about six 1 oz. servings after being strained.
Doesn’t look very appealing in this form, but hopefully Drew likes squash as much as his Mom does!
**Update** He liked the squash! Yay! I’m so glad he’s such a good eater. 🙂
Steak Tips with Peppered Mushroom Gravy
January 25, 2010
Sunday was a nasty, rainy, windy day here. It always seems to be raining or really cold on my days off lately. We couldn’t get out and do much so I decided to try out this new recipe for dinner. I didn’t want the day to be a total loss and what better thing to do when the weather is too bad to go out but cook! This was the perfect dinner for a rainy day in. It’s a super easy dish and very hearty!
Steak Tips with Peppered Mushroom Gravy
1. Cook noodles according to package directions, omitting salt and fat; drain.
2. While noodles cook, heat a large nonstick skillet over medium-high heat. Coat pan with cooking spray. Add steak; sauté 5 minutes, browning on all sides. Remove from pan; cover.
3. Melt butter in pan over medium-high heat. Add shallots and mushrooms; sauté 4 minutes. Add garlic; sauté 30 seconds. Stir in soy sauce. Sprinkle flour over mushroom mixture; cook 1 minute, stirring constantly. Gradually add broth, stirring constantly. Add pepper, salt, and thyme sprigs. Bring to a boil; cook 2 minutes or until thickened. Return beef to pan; cook 1 minute or until thoroughly heated. Discard thyme sprigs. Garnish with thyme leaves, if desired.
Source: Cooking Light
Adventures with Baby Food: Green Beans and Pumpkin
January 19, 2010
Drew is moving on to more new foods. So far he has tried carrots, sweet potatoes, sweet peas, pumpkin, and green beans. He loves them all except for the sweet peas. He was NOT a fan according to his teacher at daycare. So we’ll just have to go back to those later. I’m really glad he is trying all these new foods and liking them. As much as I love to cook, my worst nightmare is having a child that is a picky eater. I already have a husband that is! For the pumpkin, I pretty much just used canned pumpkin and mixed in it in his cereal. I froze the rest in my baby food freezer trays just like I did here.
You can see he ate it up!
For the green beans, I used frozen green beans and steamed them until they were tender. Then I pureed them in my food processor making sure to puree them well. Then I also froze them in the trays and stored them in freezer bags as I’ve done with his other foods.
One 16 oz bag makes about 14-16 1 oz servings.
I have found it to be so easy to make Drew’s food so far and it costs so much less than buying pre-packaged baby food. For instance on the green beans, I got the bag of frozen beans on sale for $1.00 and it made about 14 servings. One container of pre-packaged baby food green beans at the store is around $1.25! Granted, Drew is only eating about 1 oz of food mixed in with his cereal right now, but still the savings are huge. When I first decided to make his food I was a little nervous. Afterall, this is my first child and I really didn’t know what foods to start him off on. So while in the grocery store, I stopped by the baby food aisle and looked at the 1st foods to see what types there were. I also read a lot of articles online about making baby food as well as other blogs. So if you’re thinking about doing this too, don’t be afraid. It really is so easy and doesn’t take much time at all. Just spend a little time on the weekends preparing the food and then pull it out of the freezer during the week. Plus you’ll save a ton of money and you’ll know exactly what’s in your baby’s food.
Adventures with Baby Food: Carrots and Sweet Potatoes
January 4, 2010
I’ve been gone a while, I know! To be honest, I didn’t have much time to bake over the Christmas holidays because we were so busy traveling. I did bake a little, but it was mostly things I already have in my blog. And while I’ve been gone my baby turned 6 months old!! It’s so hard to believe. He’s been eating cereal for a couple months now and finally is getting the hang of it I think. So I decided it was time to start him on some solid foods. I’ve always wanted to make my own baby food, one because it’s cheaper and two, it really seems easy to do. So I decided that I would start off with carrots. I’ve read not to start off with fruits because babies will tend to prefer sweeter foods more than veggies, but I didn’t want to start off with green foods either. So I thought carrots would be a happy medium. It’s pretty self explanatory how to do this but here are the steps.
Baby Food: Carrots
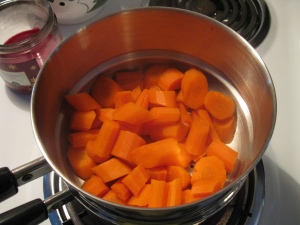
4 large carrots, peeled, washed, and cut up into small pieces
Steam until tender. Allow to cool.
Puree in a food processor until very smooth. Scrape down the sides to make sure you get all the carrots pureed.
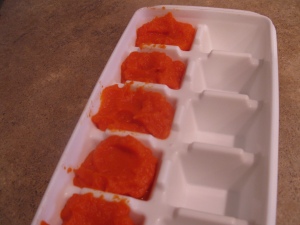
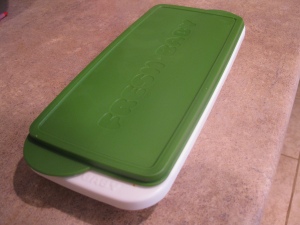
Spoon the pureed carrots into ice cube trays and cover with foil. You can also use these baby food freezer trays. Place in the freezer.
Once frozen, pop the cubes out of the trays and store in freezer bags. Be sure to label them with what’s in the bag and when you made it.
4 large carrots made about 6-7 one oz. servings.
I will probably make more next time, but I wasn’t sure how much it would make. You can thaw the frozen cubes in the fridge overnight and thin with water or cereal/formula/breastmilk combo if needed.
And the result of my first baby food making attempt??
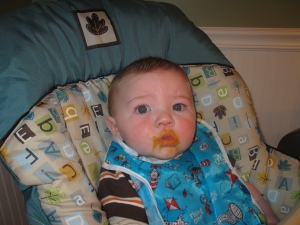
He ate them! He doesn’t look very happy in this picture, but he really did seem to like them. He kept opening his mouth for more every time I would show him the spoon. After a few days of trying carrots, we’ll move on to the sweet potatoes. Everything I’ve read says you should wait a few days in between trying new foods in case one particular food causes an allergic reaction. Something else I learned is that I should probably take his clothes off before feeding him and maybe wear a raincoat! It was so messy and we had carrots on his clothes, the table, and me!
Baby Food: Sweet Potatoes
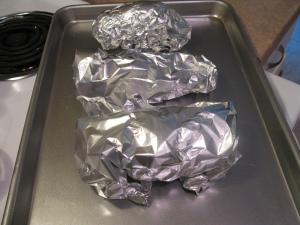
Thoroughly wash 3 medium sized sweet potatoes. Poke holes all over each potato with a fork. Wrap in foil and place on a baking sheet. Bake at 450 for 1 hour-1 hour 15 min. They should be fork tender. Allow to cool. Remove the skins from the sweet potaotes and discard. Place the potatoes in a food processor and puree until very smooth. Spoon into freezer trays. Once frozen, pop the cubes out of the trays and store in labeled freezer bags.
3 medium sweet potatoes made 12 one oz. servings.
A New Take on Chili
October 27, 2009
Back when I was on maternity leave and had tons of time to sit around and watch tv, I saw Giada make this recipe on her show. I’ve been thinking about it ever since and just waiting on the weather to cool off a little so that I could justify making it. We had some friends over last night to go to the annual Howl-a-ween event in our town where dogs dress up and go to the stores trick-or-treating, and I thought this would be a perfect meal to enjoy on a Fall evening. I think it turned out really well. It’s a bit lighter than a normal chili and has tons of great flavor. I made this in the crock pot so it would be ready for dinner last night and it worked really well. Give it a try sometime when you’re bored with your old chili recipe.
White Bean and Chicken Chili
In a large heavy-bottomed saucepan or Dutch oven, heat the oil over medium-high heat. Add the onion and cook until translucent, about 5 minutes. Add the garlic and cook for 30 seconds. Add the ground chicken, 1 teaspoon salt, cumin, fennel seeds, oregano, and chili powder. Cook, stirring frequently, until the chicken is cooked through, about 8 minutes. Stir the flour into the chicken mixture. Add the beans, Swiss chard, corn, and chicken stock. Bring the mixture to a simmer, scraping up the brown bits that cling to the bottom of the pan with a wooden spoon. Simmer for 55-60 minutes until the liquid has reduced by about half and the chili has thickened. Add the red pepper flakes and simmer for another 10 minutes. Season with salt and pepper, to taste.
Ladle the chili into serving bowls. Sprinkle with the Parmesan cheese and chopped parsley.
Source: Food Network
