Gumbo
August 4, 2009

Gumbo is one of those things that I’ve wanted to make for a long time now but was just unsure about which recipe to use. There are only 139,000,000 on the internet and a few more in my cookbooks so it’s hard to know which one is the best. Well I think I found the best, with a few little tweaks. I finally decided to read some reviews on All Recipes and that’s how I made my decision on which recipe to try. I made it for my parents for dinner last night with some long grain white rice and crusty bread. And oh it was so good! My parents couldn’t stop talking about how good it was and I agree. It had just the right amount of heat and all the flavors combined really well. This will most definitely be my go-to recipe for gumbo from now on!
Gumbo Style Chicken Creole
- 1/4 cup oil for frying
- 1/4 cup all-purpose flour
- 1 green bell pepper, chopped
- 1 onion, chopped
- 2 cups cooked, chopped chicken breast meat
- 1 (14.5 ounce) can diced tomatoes with green chile peppers, with liquid
- 1 (4.5 ounce) can sliced mushrooms, drained (omitted)
- 2 tablespoons chopped fresh parsley
- 2 teaspoons Worcestershire sauce
- 3 cloves garlic, minced
- 1 teaspoon soy sauce
- 1 teaspoon white sugar
- 1/2 teaspoon salt
- 1/2 teaspoon ground black pepper
- 3 dashes hot sauce (I used 1/2 tsp cayenne pepper-use less if desired)
*I added 3 cups low sodium chicken broth, 2 links of smoked sausage, sliced, and 1 1/2 cups of raw chopped shrimp.
- Heat oil in a large skillet over high heat. Stir in flour and cook, stirring constantly, for 5 minutes or until mixture is the color of a copper penny. Reduce heat to low and stir in bell pepper and onion. Cook 10 to 15 minutes, or until tender, stirring occasionally.
- Add chicken, sausage, tomatoes with green chile peppers, mushrooms (omitted), parsley, Worcestershire sauce, garlic, soy sauce, sugar, salt, pepper and hot sauce (or cayenne), and chicken broth. Stir together, cover and simmer for 20 minutes.
*Add shrimp the last 5 minutes and cook until pink. I also cooked mine for least 1/2 an hour. I served this over white rice.
Source: All Recipes
Seriously, go out right now and buy the ingredients for this. And if it’s too hot out, just crank up your AC and make it anyway. You will not be sorry.
Tasty Tools: Asian Pork Stir Fry
August 28, 2008
It’s that time again to highlight another kitchen utensil in the monthly Tasty Tools blog event hosted by Joelen. This month’s tool is the whisk. Everyone has these in their kitchen and I for one never think twice about pulling one out to beat some eggs or pancake batter. But it’s a handy little tool. I particularly love the one I used tonight to mix up the sauce for my asian pork stir fry. It’s the mini whisk from Pampered Chef. It’s the perfect little tool for beating just an egg or two and whisking together ingredients for a salad dressing or marinade.
I make my chicken stir fry pretty much the same way I made this. We had chicken last night so I thought using some pork chops in this stir fry would be great. It was a very easy and delicious dinner.
Asian Pork Stir Fry
3-4 1″ thick center cut, boneless pork chops (or pork loin), cut into 1″ pieces
3 large carrots, peeled and sliced diagonally into strips
1/2 a large onion, diced
1 cup broccoli florets, fresh or frozen
1/4 cup lite soy sauce
2 Tbsp honey
1-2 cloves minced or pressed garlic
2 Tbsp olive oil
Begin by combining the soy sauce, honey, and garlic in a small bowl. Whisk to incorporate the honey into the soy sauce. Set aside. Add 2 Tbsp olive oil to a skillet and heat over medium heat. Add the pork to the skillet and cook about 5 minutes. Remove from the pan and set aside. Add the onion and carrots to the pan. Cook covered (to steam the vegetables) about 5 minutes. Add the pork back to the pan to finish cooking along with the soy sauce mixture. Add the broccoli the last 5-6 min and cook covered. Serve over rice.
Tasty Tools: BBQ Beef Kabobs
July 29, 2008
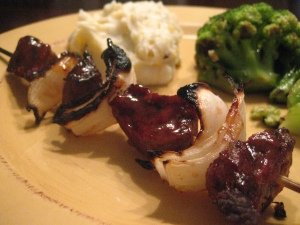
I’m a slacker. I never have time to participate in all the blog events that I would like to. I am really envious of everyone that participates in multiple blog events, but by the time I get home from work I barely have time to cook dinner and the occasional dessert. That’s why I’ve sort of fallen off the wagon with the Tasty Tools blog event that Joelen hosts every month. I thought I wasn’t going to make it this month either but luckily, I remembered I had planned on making these beef kabobs so I figured I could highlight this month’s tool in this recipe.
And the tool of the month is…the pastry and basting brush! What an awesome and often overlooked tool. I use mine all the time and most of the time I wish I had two because it always seems to be in the dishwasher when I need it. Yes, I said dishwasher. I know with most pastry brushes you can’t put them in the dishwasher, but that’s another reason I love mine. I have the chef’s silicone basting brush made by Pampered Chef. I seriously love this thing. It’s heat resistant so you don’t have to worry about it melting should you accidently touch your grill or a hot pan with it. It resists stains and doesn’t retain odors. Another little feature that is simple but very helpful is the fact that it has a little hook on the back so you can rest it on the side of your bowl and it won’t slide down into whatever’s in the bowl. I use it for basting and barbecuing meats and also for brushing delicate pastries with egg wash or butter. I think it’s a great and versatile tool that everyone should have in their kitchen.
BBQ Beef Kabobs
1/2 lb boneless beef sirloin steak, 1″ thick, cut into 1″ cubes
2 Tbsp vegetable oil
2 cloves garlic, minced
1 Tbsp of your favorite grill seasoning
2 tsp worcestershire sauce
1/2 an onion, cut into 1″ pieces
barbecue sauce for basting (use your favorite flavor)
In a bowl combine the sirloin, onion, grill seasoning, vegetable oil, garlic and worcestershire sauce. Toss to coat the meat and onions. Cover and refrigerate at least 4-6 hours. Remove from the refrigerator about 20 minutes before grilling. Skewer the meat and onions on soaked wooden skewers (to prevent burning on the grill). Place the kabobs on a hot grill or grill pan. Once the outside of the meat begins to show grill marks, brush with your favorite barbecue sauce. Grill until the meat reaches desired doneness.
Serves 2
Marinated Chicken Kabobs
June 17, 2008
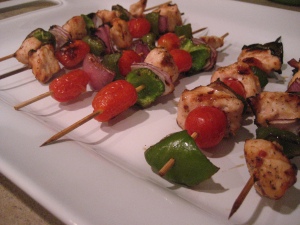
Here’s another delicious dinner to add to my “it’s too freakin’ hot to cook inside” list. My sister was visiting for my birthday so I decided we would grill out last night. I had all the ingredients to make chicken kabobs so I decided to use this marinade recipe that I’ve used before and added about 1 tsp each salt and pepper. I used chicken, cut into 1″ chunks, bell pepper, red onion, and grape tomatoes. I tossed them all in a bowl with the marinade and let them marinate for an hour. Then I put the chicken and veggies on soaked skewers (to prevent burning on the grill). I also made some red potatoes in a foil packet on the grill so I wouldn’t have to do any cooking inside. I seasoned them simply with salt pepper and lemon juice and left them on the grill about 30 minutes. It was a wonderful birthday dinner, even if I did make it myself. : P
On another note, I got new kitchen toys for my birthday! My wonderful husband got me the KitchenAid ice cream attachment and an extra bowl for my mixer. I’m so excited to make some frozen treats for summer!
Summertime Grillin’
June 9, 2008
It is very evident by the suffocating heat and humidity that Summer is upon us. I think somehow Spring just passed us by here in Alabama. And with this hot weather comes the smell of grills firing up all around my neighborhood. Sure there is something wonderful about grilled food that makes you feel more relaxed like you’re having a back yard party even if it’s just a week night, but let’s face it, it’s just about too darn hot to cook inside! Lately I’ve been dreading turning on my oven. By the time I get dinner done, I’m sweaty and have to cool down before I can even eat. So needless to say you are probably going to be seeing more grilled foods in my blog for a while.
Now whenever I ask what my husband what he wants to grill he will most always say “burgers”. The guy loves some burgers. In the evenings when we walk our dogs around our neighborhood if he smells the smoke of grill he will always say “we need to grill burgers soon”. Now I get tired of plain old burgers. I can think of tons of other things that I would love on the grill. But what can I say, he has simple tastes. So tonight I decided we would grill burgers but I wanted to change them up a bit from my regular recipe. So I threw some ingredients together and what came out was a super moist, smoky, and delicious burger. You should definitely give this one a try if you’re looking to change up your regular burger recipe.
*I also think bacon would be awesome on these burgers.
Barbecue Burgers
1 1/4-1 1/2 lb ground beef or chuck
1/4 cup barbecue sauce plus more for brushing the tops of the burgers (I used honey bbq because that’s what I had)
2 cloves garlic, minced (3 cloves if they’re small)
1 tsp worcestershire sauce
1/3 cup bread crumbs
1 tsp salt
1 tsp ground black pepper
*Buns
*Sliced sharp cheddar cheese
Combine all ingredients in a bowl. Form into 6 patties. Place on a hot grill or grill pan and cook until desired doneness. Brush the tops of the burgers with the extra barbecue sauce once they’re done. Top with the sharp cheddar and remove from the grill. Place the buns on the grill and allow them to toast for about 5 minutes or so.
Carmelized Onions and Mushrooms
1 yellow or sweet onion, sliced into thin strips
2 cups mushrooms, cleaned and chopped into 1/2″ chunks
1 tsp salt
1 tsp ground black pepper
1/2 tsp sugar
2 Tbsp butter
2-3 Tbsp beef broth or water
Melt the butter in a skillet over medium heat. Add the onions to the pan and toss to coat with the butter. Add the salt, pepper, and sugar and toss again. Cover and allow to cook down about 5-7 minutes or until you start to see a light brown coloring on the onions. Add the mushrooms in and stir together with the onions. Cover and allow to cook another 5 minutes. Add the broth or water to deglaze the pan and get all the brown bits off the bottom. Serve on top of the barbecue burgers.


