At Last!
January 28, 2009
I never thought the day would come when I would have a blog update again. For those who don’t know why I’ve been MIA, I’m pregnant and food in general has not been my friend for the past oh, 16 weeks. For those of you that have been pregnant and know what I’m talking about, bless your heart. For those who haven’t been, bless your heart even more. Our dinners have been consisting of cold cereal, toast, frozen pizza, sandwiches, or whatever did not make me want to hurl on that particular day. My husband has been so great about it, although I’m pretty sure peanut butter and jelly is not on his list of favorite foods anymore.
Well I’m slowly coming out of this funk I’ve been in and I have a little more energy. I was lucky enough to get off work early today so I thought what a perfect day to re-enter the cooking world and make a great dinner. I was looking at the Pioneer Woman’s blog last night and saw this recipe for Ranch Style Chicken. It sounded and looked really good and I had almost everything needed to make it. Plus, it is really easy. Now that’s my kind of recipe! Nothing too hard for my already scattered pregnant brain. I marinated the chicken for about 3 hours, made some simple roasted red potatoes and sauteed some green beans with a little extra virgin olive oil and garlic. And the result…
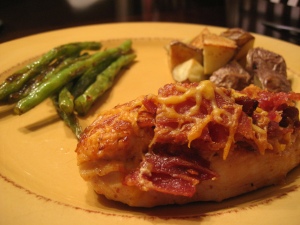
The best dinner I’ve had in a long, long time! I know that’s not saying much given what I’ve been eating but trust me, it was good. I mean, what could really be bad about anything with bacon and cheese? Hopefully this is the beginning of many more blog posts to come!
For the recipe go here–Ranch Style Chicken
Also an apology…I’m so sorry for not following anyone’s blog lately. Now that I’m feeling better I am very much looking forward to catching up on all the great recipes I’ve been missing!
Tasty Tools: Asian Pork Stir Fry
August 28, 2008
It’s that time again to highlight another kitchen utensil in the monthly Tasty Tools blog event hosted by Joelen. This month’s tool is the whisk. Everyone has these in their kitchen and I for one never think twice about pulling one out to beat some eggs or pancake batter. But it’s a handy little tool. I particularly love the one I used tonight to mix up the sauce for my asian pork stir fry. It’s the mini whisk from Pampered Chef. It’s the perfect little tool for beating just an egg or two and whisking together ingredients for a salad dressing or marinade.
I make my chicken stir fry pretty much the same way I made this. We had chicken last night so I thought using some pork chops in this stir fry would be great. It was a very easy and delicious dinner.
Asian Pork Stir Fry
3-4 1″ thick center cut, boneless pork chops (or pork loin), cut into 1″ pieces
3 large carrots, peeled and sliced diagonally into strips
1/2 a large onion, diced
1 cup broccoli florets, fresh or frozen
1/4 cup lite soy sauce
2 Tbsp honey
1-2 cloves minced or pressed garlic
2 Tbsp olive oil
Begin by combining the soy sauce, honey, and garlic in a small bowl. Whisk to incorporate the honey into the soy sauce. Set aside. Add 2 Tbsp olive oil to a skillet and heat over medium heat. Add the pork to the skillet and cook about 5 minutes. Remove from the pan and set aside. Add the onion and carrots to the pan. Cook covered (to steam the vegetables) about 5 minutes. Add the pork back to the pan to finish cooking along with the soy sauce mixture. Add the broccoli the last 5-6 min and cook covered. Serve over rice.
Pioneer Woman’s Spicy Shredded Pork
August 19, 2008
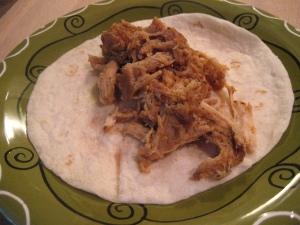
Ok, so I’m a little behind here. I just recently started reading the Pioneer Woman’s blog. I had heard what a great blog it was but just had not gotten around to checking it out. Well I am so glad I did. Not only is she funny and witty, she has great photos and delicious looking food! When I saw this recipe, I immediately put it on my menu for this week. I planned on making it this weekend to use later in the week, but I almost didn’t have time! We were so busy this weekend that I almost didn’t remember to cook it. Luckily, I did remember and threw it my dutch oven and cooked it for about 3 hours yesterday afternoon. By that time it was just falling apart. So moist and tender. I used this to make myself a taco last night and my husband made a sandwich. And the verdict? So good! You must make this. Your house will smell awesome while it’s cooking and your mouth will be happy, too. This shredded pork could be used in lots of recipes from tacos and sandwiches to soups and stews.
For the recipe, go here. The only change I made was to use a 3lb pork loin.
Tasty Tools: BBQ Beef Kabobs
July 29, 2008
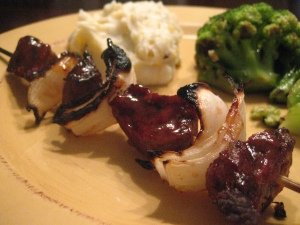
I’m a slacker. I never have time to participate in all the blog events that I would like to. I am really envious of everyone that participates in multiple blog events, but by the time I get home from work I barely have time to cook dinner and the occasional dessert. That’s why I’ve sort of fallen off the wagon with the Tasty Tools blog event that Joelen hosts every month. I thought I wasn’t going to make it this month either but luckily, I remembered I had planned on making these beef kabobs so I figured I could highlight this month’s tool in this recipe.
And the tool of the month is…the pastry and basting brush! What an awesome and often overlooked tool. I use mine all the time and most of the time I wish I had two because it always seems to be in the dishwasher when I need it. Yes, I said dishwasher. I know with most pastry brushes you can’t put them in the dishwasher, but that’s another reason I love mine. I have the chef’s silicone basting brush made by Pampered Chef. I seriously love this thing. It’s heat resistant so you don’t have to worry about it melting should you accidently touch your grill or a hot pan with it. It resists stains and doesn’t retain odors. Another little feature that is simple but very helpful is the fact that it has a little hook on the back so you can rest it on the side of your bowl and it won’t slide down into whatever’s in the bowl. I use it for basting and barbecuing meats and also for brushing delicate pastries with egg wash or butter. I think it’s a great and versatile tool that everyone should have in their kitchen.
BBQ Beef Kabobs
1/2 lb boneless beef sirloin steak, 1″ thick, cut into 1″ cubes
2 Tbsp vegetable oil
2 cloves garlic, minced
1 Tbsp of your favorite grill seasoning
2 tsp worcestershire sauce
1/2 an onion, cut into 1″ pieces
barbecue sauce for basting (use your favorite flavor)
In a bowl combine the sirloin, onion, grill seasoning, vegetable oil, garlic and worcestershire sauce. Toss to coat the meat and onions. Cover and refrigerate at least 4-6 hours. Remove from the refrigerator about 20 minutes before grilling. Skewer the meat and onions on soaked wooden skewers (to prevent burning on the grill). Place the kabobs on a hot grill or grill pan. Once the outside of the meat begins to show grill marks, brush with your favorite barbecue sauce. Grill until the meat reaches desired doneness.
Serves 2
Teriyaki Grilled Pork Chops
July 16, 2008
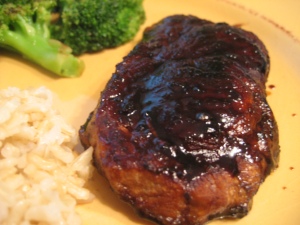
I’m cooking out of the freezer this week, trying to cut back on the grocery budget a little. Prices at the store keep going up and it seems like my grocery budget gets larger while my pantry and freezer get barer. When I opened the freezer this week to take stock of what I had in order to plan a menu, I saw two lonely pork chops sitting there. Not sure how long they’ve been in there but I felt they needed a purpose. I had saved this recipe on my google reader for teriyaki pork chops and thought those might be good one night. By the way if you don’t use google reader you definitely should! It helps so much with keeping up with blogs and recipes. Anyway, I had seen this on one of my favorite blogs, Annie’s Eats, and so I knew it had to be good. And Annie, I promise I don’t stalk your blog each week to see what you’ve made. : ) I guess we just like the same foods! These did turn out great! My husband and I both enjoyed them and it was such a quick dinner.
Teriyaki Grilled Pork Chops
Ingredients:
2/3 cup soy sauce
1/3 cup firmly packed light brown sugar
1/3 cup water
¼ cup rice vinegar
3 cloves garlic, finely chopped
2-inch piece fresh gingerroot, peeled and chopped fine (or 1 ½ tsp. dried ginger)
4-6 pork chops
Directions:
For the marinade, combine all ingredients except pork chops in a saucepan. Bring to a boil and stir until sugar is dissolved. Cool the marinade completely. Put the pork chops in a large resealable plastic bag and pour the marinade over them. Seal the bag, pressing out excess air. Allow chops to marinate, turning bag once or twice, at least 6 hours or up to overnight.
Pour the marinade into a saucepan and boil for 5 minutes. Grill chops on an oiled rack, approximately 7-8 minutes per side, or until just cooked through, basting with marinade during last 5 minutes of cooking.
Source: adapted from Elite Entrees, originally from Gourmet Magazine
Marinated Chicken Kabobs
June 17, 2008
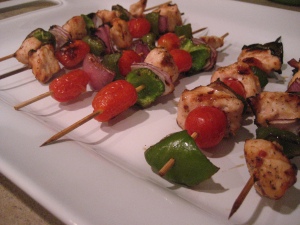
Here’s another delicious dinner to add to my “it’s too freakin’ hot to cook inside” list. My sister was visiting for my birthday so I decided we would grill out last night. I had all the ingredients to make chicken kabobs so I decided to use this marinade recipe that I’ve used before and added about 1 tsp each salt and pepper. I used chicken, cut into 1″ chunks, bell pepper, red onion, and grape tomatoes. I tossed them all in a bowl with the marinade and let them marinate for an hour. Then I put the chicken and veggies on soaked skewers (to prevent burning on the grill). I also made some red potatoes in a foil packet on the grill so I wouldn’t have to do any cooking inside. I seasoned them simply with salt pepper and lemon juice and left them on the grill about 30 minutes. It was a wonderful birthday dinner, even if I did make it myself. : P
On another note, I got new kitchen toys for my birthday! My wonderful husband got me the KitchenAid ice cream attachment and an extra bowl for my mixer. I’m so excited to make some frozen treats for summer!
Chicken and Spinach Quesadillas
June 11, 2008
Here’s another terrific recipe that I snagged from another food blog, Annie’s Eats. I have gotten several great recipes from this blog. What can I say, the girl knows good food! And as I expected, this recipe definitely didn’t disappoint. What’s even better is it uses ingredients that I almost always have on hand; chicken, spinach, and tortillas. I also made some simple black beans to go along with my quesadilla tonight. I seasoned them with garlic powder, salt, pepper, and red pepper flakes. This meal also gave me a reason to pull out this amazing salsa that I bought while we were in Houston, TX last month. It’s not your traditional tomato based salsa and is made only of fire roasted peppers. And it is HOT! A little of this stuff goes a long way. It went so well with these delicious quesadillas.
Chicken and Spinach Quesadillas
Ingredients:
1-2 boneless, skinless chicken breasts
3 tbsp. lime juice
1 tbsp. vegetable oil
¼ tsp. red pepper flakes
1-2 cloves garlic, crushed
fajita seasoning, to taste
1 tbsp. olive oil, plus more for brushing
3-4 oz. button mushrooms, trimmed and sliced
1 cup packed fresh spinach
3-4 flour tortillas
1 cup shredded Monterey Jack cheese
Directions:
Combine the lime juice, vegetable oil, red pepper flakes and garlic in a plastic bag. Seal and shake well to combine. Add the chicken breast to the bag and allow to marinate at least 1 hour and up to 8 hours.
Place the chicken in a nonstick skillet and sprinkle to taste with fajita seasoning. Cook on medium-high heat until cooked through. Cut into small pieces and set aside. In the same skillet, heat 1 tbsp. olive oil over medium-high heat. Add mushrooms and sauté until tender, about 3 minutes. Add the chicken and spinach and sauté just until the spinach is wilted, about 30 seconds. Transfer the mixture to a bowl and set aside.
Brush a grill pan with olive oil and heat to medium/medium-high heat. Divide the chicken mixture among the tortillas, spooning it onto half of each tortilla and leaving a border uncovered near the edge. Sprinkle evenly with the cheese. Fold the tortillas in half over the chicken mixture to enclose loosely. Place on grill pan and cook until dark grill marks have formed on one side of the tortilla. Flip over and repeat to achieve grill marks on both sides. Repeat with remaining quesadillas. Serve as desired with sour cream, salsa and guacamole.
Source: adapted from Williams Sonoma
Garlic and Herb Roasted Pork
June 3, 2008
As I was wandering the aisles of the grocery store last week looking for orzo, I came across couscous on the shelf. I had never had it before so I decided I’d pick some up to try this week. I opted for the pre-seasoned roasted garlic and olive oil kind since this would be my first time making it. So I stuck it in the cabinet and sort of forgot about it. Tonight, I was trying to think of a side for my pork roast and then I remembered that I had bought the couscous so I figured, what the heck, I’ll give it a try. I figured it would be pretty boring on its own so I decided to add about a 1/4 cup of chopped spinach and a tablespoon of lemon juice to it. I had seen this on a blog earlier this week (although I can’t remember which one). I’m pretty sure there was more involved in that recipe, but since I was using the already seasoned couscous, I just left it at that. I have to say it was pretty good and even my picky husband ate it, but I wouldn’t say it was my favorite thing ever. But even if it hadn’t been good, the roasted pork loin I made would have more than made up for it. It was so moist, flavorful and delicious. I’m really enjoying coming up with ways to use the fresh herbs I’m growing and this recipe couldn’t be simpler. It’s definitely quick and easy enough for a weeknight meal.
Garlic and Herb Roasted Pork Loin
2 lb pork loin
2 Tbsp chopped basil
1 Tbsp chopped parsley
1 tsp dried thyme (I didn’t have any fresh)
1 tsp Pampered Chef citrus basil seasoning (you could omit this but I really like it)
1/2 tsp salt
1/2 tsp black pepper
4 cloves garlic, minced
2 Tbsp extra virgin olive oil plus 2 more Tbsp
Begin by cutting 4-5 slits diagonally across the top of the pork loin about 1/2 ” deep. Sprinkle the citrus basil seasoning, salt and pepper on the pork roast. Combine the remaining ingredients in a bowl to form a paste. Rub the paste over the top and bottom of the roast, making sure to rub it into the slits as well. Cover and marinate in the refrigerator for at least an hour and up to 1 day. When ready to cook, preheat the oven to 375. Add 2 Tbsp olive oil to a dutch oven or other heavy bottomed pan and heat over medium high heat. Place the pork roast in the pan and sear on all sides. Place the pan in the preheated oven and cook for 25-30 minutes or until the internal temp is 160-165F. Remove from the oven and place aluminum foil over the roast. Let set for about 10 minutes. The temperature will rise another 5-10 degrees. Slice and serve.
Balsamic Chicken
October 2, 2007
I’m revisiting some recipes I’ve made before and saved under my favorites. This is one I tried many months ago and since I’ve been making so many new recipes, I hadn’t gotten back around to making it. I thought it would be a nice change so I put it on this week’s menu. I adapted Giada’s recipe to use boneless skinless chicken breasts since we don’t really eat drumettes. It’s simple to make and very tasty. We had this tonight with brown rice and steamed green beans.
Here’s the recipe as I made it.
Balsamic Chicken
1/2 cup balsamic vinegar
1/2 cup honey
1/2 cup brown sugar
1/4 cup soy sauce
5 garlic cloves, halved
2 boneless, skinless chicken breasts cut into thin strips
1/4 cup chopped fresh flat-leaf parsley
Combine the balsamic, honey, brown sugar, soy sauce, and garlic cloves, in a large, re-sealable plastic bag. Shake and squeeze the contents of the bag to dissolve the honey and the brown sugar. Add the chicken to the bag and seal with as little air as possible in the bag. Place in the refrigerator and marinate for 2 hours.
Preheat the oven to 450 degrees F.
Place the chicken on a foil-lined baking sheet. Bake until it is caramelized and very dark in spots, about 15 min (7 1/2 min per side).
Meanwhile, place the marinade in a small saucepan. Bring the marinade to a boil (in order to kill bacteria). Reduce the heat to simmer and cook over low heat until thick, about 15 minutes. Reserve.
Use a pastry brush to brush some of the cooked marinade on the cooked chicken. Place the chicken on a serving platter. Sprinkle with the chopped parsley.
Original Source: foodnetwork.com
More with Chicken…
September 14, 2007
Here’s yet another yummy dinner idea that came about as I was perusing some of my favorite food blogs. I saw a recipe on Joelen’s blog for Giada’s garlic and citrus chicken and thought the flavor combo sounded good. I didn’t have a whole chicken to make the recipe exactly as it stated so I decided to turn it into a marinade for boneless skinless chicken breasts and grill them instead. They turned out really great! The citrus in the marinade really came through in the flavor of the chicken and also caramelized nicely to create a golden brown “crust” as it grilled. We had these for dinner tonight with roasted red potatoes and green beans steamed with garlic cloves.
Here’s how I made the marinade
1/3 cup orange juice
1/4 cup lemon juice
1/2 cup chicken broth
4-5 cloves garlic, crushed
1 tsp dried oregano
Place chicken breasts (I did 2) in a bowl. Combine juices and chicken broth and pour over the chicken. Sprinkle the top of the chicken with oregano and garlic. Refrigerate, covered, for a couple hours or over night, turning chicken in the marinade periodically. Remove from marinade and grill or bake until done.


